Dr. Zhuravsky does virtual consultations for patients from all over the country, dedicating the same level of attention through video as he does in-person. While video meeting quality has come a long way, good quality photos are very helpful for a more accurate assessment.
Photography is especially important for Rhinoplasty patients in order to perform computer morphed images. Dr. Z has found the process of morphing images along with his patients, while talking through the changes to be an essential part of a good rhinoplasty consultation. If the photos are grainy, the lighting is poor, or the angles are off, patients might not get the full benefit of this process. Below are some tips on how to take good photos for some of the most popular procedures.
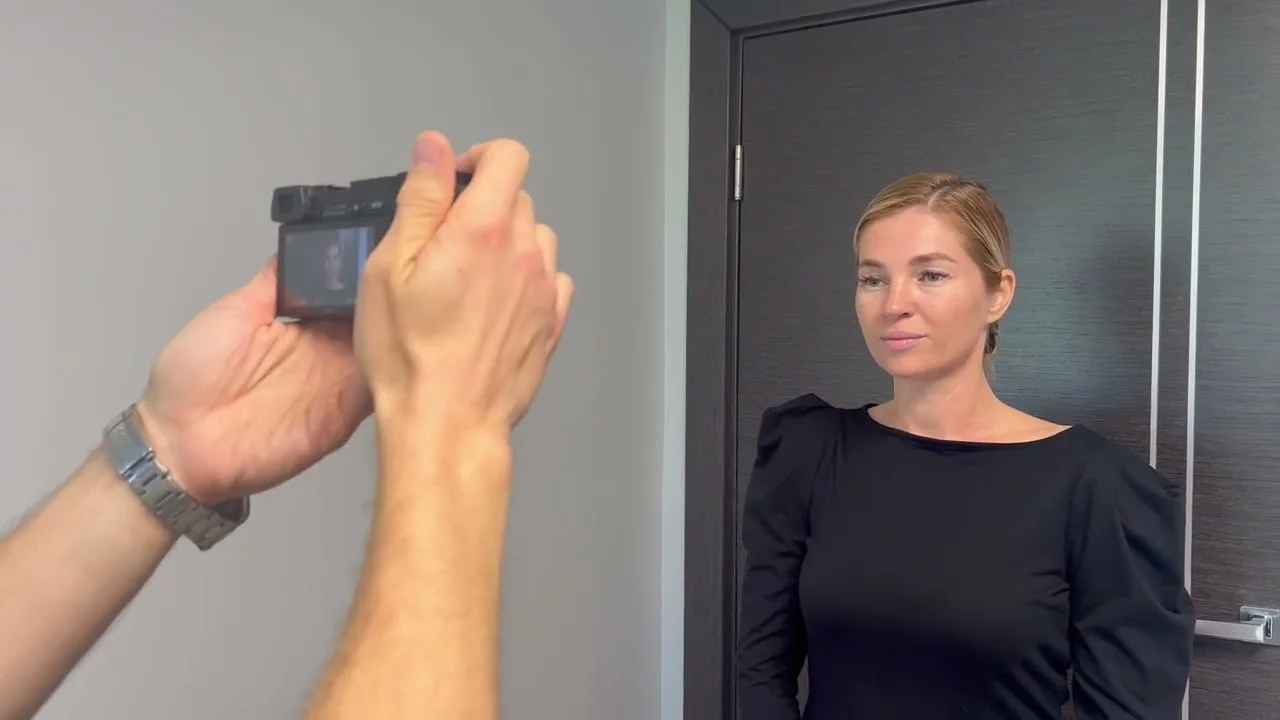
Have Someone Else Take The Photos
Location
Distance
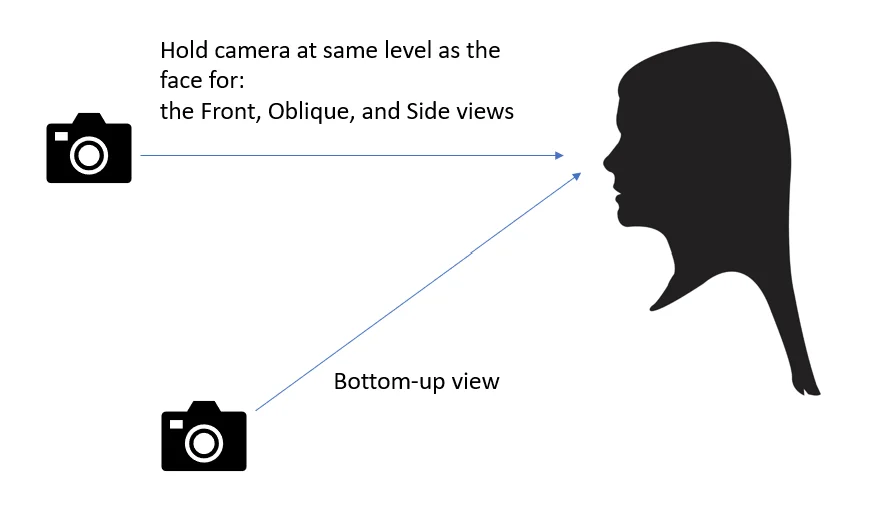
Make sure camera is at eye level to the patient
Make sure the patient’s head is level
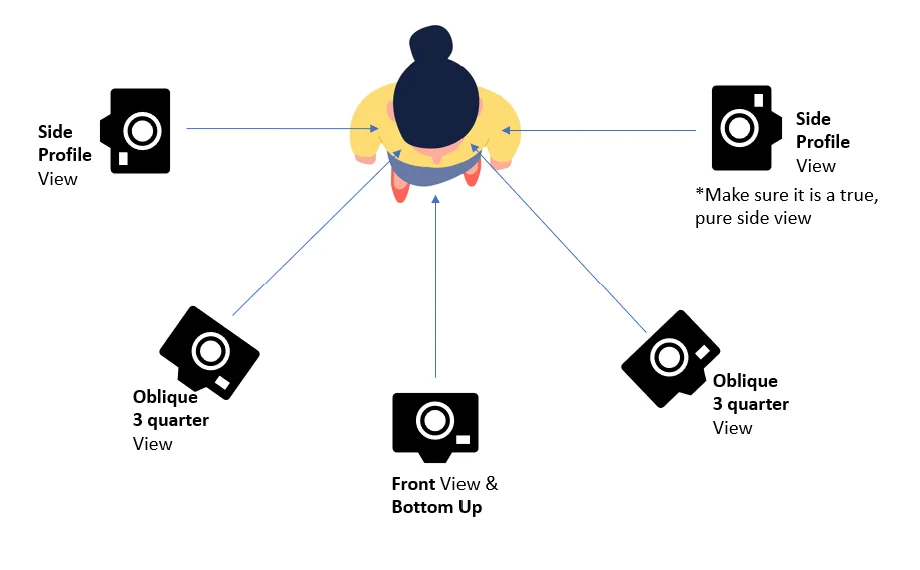
8 photos total for rhinoplasty
Make sure camera is at eye level to the patient
For standard photos, have the head level
7 photos total for facelift
Make sure the camera is at level with the lips
Make sure your head is level (not tilted up or down)
4 photos total for Lip Lift
Make sure camera is at eye level to the patient
Make sure the patient’s head is level
4 photos total for browlift
Make sure camera is at eye level to the patient
Make sure the patient’s head is level
4 photos total for upper blepharoplasty
Make sure camera is at eye level to the patient
Make sure the patient’s head is level
6 photos total for lower blepharoplasty